This is the shader that we will be having at the end of this tutorial.

The curved surface shader is capable of achieving really varied visual effects from showing space-time curve due to gravity to a generic curved world shader that is seen in endless runners like Subway Surfers.
The concepts that you learn here can open you up to a new way of looking at shaders and if you didn't think they were the coolest thing ever already, hopefully let this be the turning point.😝.
Both the examples show above use the same exact material is just that different values have been passed to the shader.
Start by creating a new unlit shader in Unity and we will work our way from there.
First we define what the properties are:
_MainTex("Texture", 2D) = "white" {}
_BendAmount("Bend Amount", Vector) = (1,1,1,1)
_BendOrigin("Bend Origin", Vector) = (0,0,0,0)
_BendFallOff("Bend Falloff", float) = 1.0
_BendFallOffStr("Falloff strength", Range(0.00001,10)) = 1.0
This is how they are defined in the CG Program section:
float3 _BendAmount;
float3 _BendOrigin;
float _BendFallOff;
float _BendFallOffStr;
Now let's look at the vertex shader:
v2f vert(appdata v)
{
 v2f o;
 o.vertex = UnityObjectToClipPos(curveIt(v.vertex));
 o.uv = v.uv;
 UNITY_TRANSFER_FOG(o,o.vertex);
 return o;
}
As you can we have a function called curveIt which processes the input vertex values and passes it onto to be converted to clip space.
Now the gravy of the entire shader - The CurveIt Function:
float4 curveIt(float4 v)
{
 /*1*/float4 world = mul(unity_ObjectToWorld, v);
 /*2*/float dist = length(world.xyz - _BendOrigin.xyz);
 /*3*/dist = max(0, dist - _BendFallOff);

 /*4*/dist = pow(dist, _BendFallOffStr);
 /*5*/world.xyz += dist * _BendAmount;
 /*6*/return mul(unity_WorldToObject, world);
}
We will now go through those 6 lines of code that do all the magic.
- Getting world space location of a particular vertex and save it in
world - Calculating the distance between the vertex position and where the
_BendOriginis. distvalue is prevented from going below 0, This prevents undefined behavior when using pow function (-ve values don't work with pow).distvalue is raised to_BendFallOffStrvalue, which defines the steepness of the curve itself._BendAmountshould be dependent on the distance value(dist) so as to have a falloff curve, So we simply multiply it withdistand add toworld(position of vertex in world).- convert the new world space of vertex and convert back to local( object ) space.
There are no changes to fragment shader in our case.
Here is the entire shader:
Shader "BitShiftProgrammer/BendVertex"
{
    Properties
    {
        _MainTex        ("Texture", 2D) = "white" {}
        _BendAmount     ("Bend Amount", Vector) = (1,1,1,1)
        _BendOrigin     ("Bend Origin", Vector) = (0,0,0,0)
        _BendFallOff    ("Bend Falloff", Float) = 1.0
        _BendFallOffStr ("Falloff strength", Range(0.00001,10)) = 1.0
    }

    SubShader
    {
        Tags { "RenderType"="Opaque" }

        Pass
        {
            CGPROGRAM
            #pragma vertex vert
            #pragma fragment frag

            #include "UnityCG.cginc"

            struct appdata
            {
                float4 vertex : POSITION;
                float2 uv     : TEXCOORD0;
                float3 normal : NORMAL;
            };

            struct v2f
            {
                float2 uv       : TEXCOORD0;
                fixed4 norm     : COLOR;
                float4 vertex   : SV_POSITION;
            };

            sampler2D _MainTex;
            float4 _MainTex_ST;

            float4 _BendAmount;
            float4 _BendOrigin;
            float  _BendFallOff;
            float  _BendFallOffStr;

            float4 curveIt(float4 v)
            {
                float4 world = mul(unity_ObjectToWorld, v);
                float  dist  = length(world.xyz - _BendOrigin.xyz);
                dist = max(0, dist - _BendFallOff);
                dist = pow(dist, max(0.00001, _BendFallOffStr));
                world.xyz += dist * _BendAmount.xyz;
                return mul(unity_WorldToObject, world);
            }

            v2f vert (appdata v)
            {
                v2f o;
                float4 bentVertex = curveIt(v.vertex);
                o.vertex = UnityObjectToClipPos(bentVertex);
                o.norm.xyz = v.normal;
                o.norm.w = 1.0;
                o.uv = TRANSFORM_TEX(v.uv, _MainTex);
                return o;
            }

            fixed4 frag (v2f i) : SV_Target
            {
                // Simple texture fetch to keep pipeline happy
                return tex2D(_MainTex, i.uv);
            }
            ENDCG
        }
    }
}
Now it's just a matter of playing around with the material properties. This shader works best when there are enough vertices to work with. So the default Unity cube is not a good candidate. The Unity plane is a better option but still it's not enough vertices to work with... so multiple Unity planes arranged in a grid with the Curved Surface shader applied on them is the best way to test it out quickly.... or you can make a high poly plane in Blender then import it.
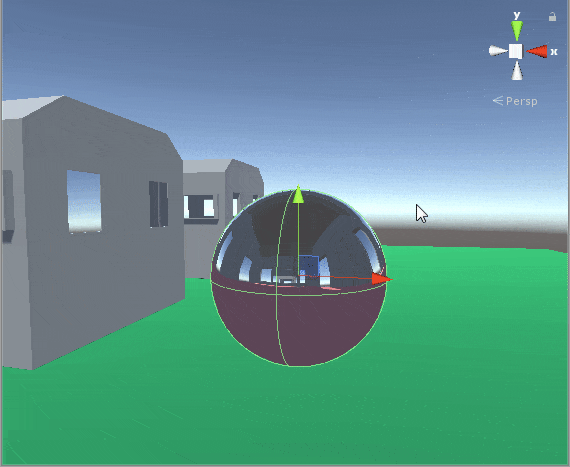
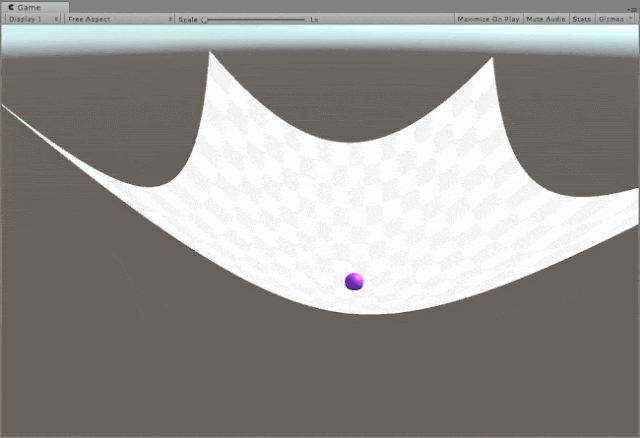
To make the Gravity Displacement example shown above it's just a couple lines of code and attaching that to a sphere primitive.
1using UnityEngine;
2public class CurvedShaderTester : MonoBehaviour
3{
4    [SerializeField] private Material curvedSurfaceMat;
5    void Start()
6    {
7        curvedSurfaceMat.SetVector("_BendAmount", new Vector3(0, 0.01f, 0));
8        curvedSurfaceMat.SetFloat("_BendFallOff", -9.8f);
9        curvedSurfaceMat.SetFloat("_BendFallOffStr", 2.0f);
10    }
11    void Update()
12    {
13        curvedSurfaceMat.SetVector("_BendOrigin", transform.position);
14    }
15}
That's literally it.
To make the Endless Runner example, we just have to modify the _BendAmount by keeping the y-axis bend as constant and changing the value either on the x-axis or z-axis depends on your case. This time instead of a sphere, We attach the script on the Camera itself.
1using UnityEngine;
2public class CurvedShaderTester : MonoBehaviour
3{
4    [SerializeField] private Material curvedSurfaceMat;
5    void Start()
6    {
7        curvedSurfaceMat.SetFloat("_BendFallOff", 17.0f);
8        curvedSurfaceMat.SetFloat("_BendFallOffStr", 2.0f);
9    }
10
11    void Update()
12    {
13        curvedSurfaceMat.SetVector("_BendOrigin", transform.position);
14        curvedSurfaceMat.SetVector("_BendAmount", new Vector3(0, -0.01f, (Mathf.Sin(Time.time) * 0.03f)));
15    }
16}